

5-minute quickstart
Download, install dependencies, create a workspace, send hello to start chatting.
This guide uses the Personal desktop edition to walk you through the full flow in four steps.
1. Download
Go to GitHub Releases and download the package for your platform:
- macOS:
niuniu-personal-<version>-darwin-arm64(Apple Silicon) orniuniu-personal-<version>-darwin-amd64(Intel) - Windows:
niuniu-personal-<version>-windows-amd64.exe - Linux:
niuniu-personal-<version>-linux-amd64
<version> is the release tag, e.g. v0.6.1. Double-click to launch — your browser will open http://localhost:3000 automatically. The Personal edition runs without any login, so you go straight to the main console.
2. System dependencies
Niuniu drives code actions through a CLI, which requires these external tools:
| Tool | Role | Minimum |
|---|---|---|
| Node.js | Runs the agent CLI | v20+ LTS |
| Python 3 | Occasionally invoked by the agent | 3.10+ |
| Git | Worktree creation, diffs, history | 2.30+ |
| Claude Code CLI or Codex CLI (either one) | Talks to the model | latest |
How to get there
In the top-right corner of the main console click ⚙ Settings → switch to the System dependencies tab:
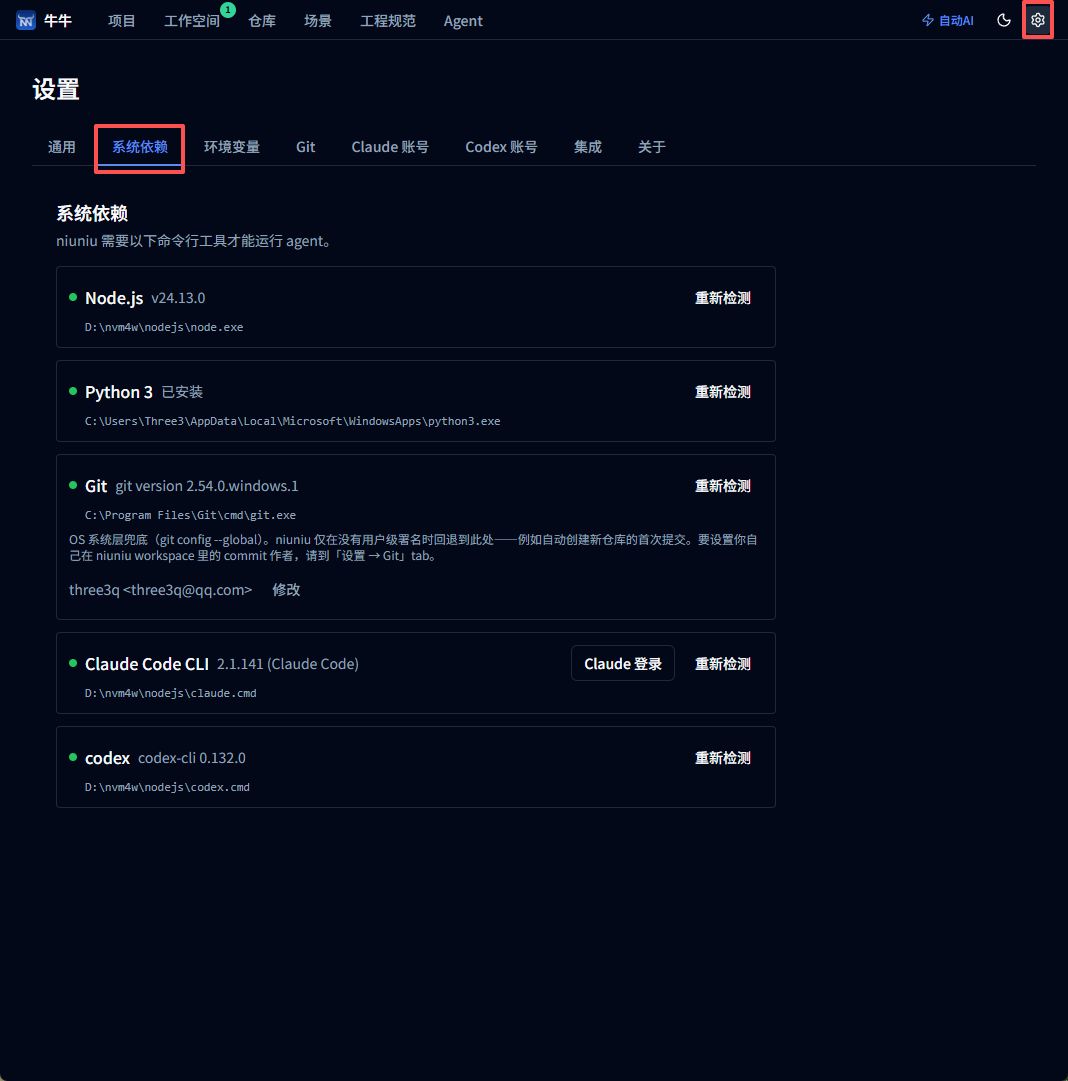
Each tool shows install status, version, and absolute path. Installed tools show a green dot; missing ones show a red ✗ with a One-click install button (uses brew on macOS, winget on Windows, apt on Linux). The CLI requires Node.js, so install Node before Claude Code or Codex.
For offline or minimal-image environments, the button switches to “Open download page” for manual install. Full details in Personal desktop install.
Model accounts: log in or configure a Key
The agent reaches the model one of two ways — pick whichever fits:
- Log in to a subscription account (recommended for Claude Pro / Max or ChatGPT Plus / Pro users):
- Claude: on the System dependencies page click Claude login on the Claude Code CLI card, or go to Settings → Claude accounts → add account. A terminal walks you through the
claude /loginOAuth flow. - Codex: go to Settings → Codex accounts, add an account, follow the OpenAI sign-in prompts.
- Claude: on the System dependencies page click Claude login on the Claude Code CLI card, or go to Settings → Claude accounts → add account. A terminal walks you through the
- Use an API Key with a third-party platform (Zhipu, Qwen, DeepSeek, MiniMax, Kimi, …): go to Settings → Environment variables, open the matching preset, and replace
ANTHROPIC_AUTH_TOKEN(or the corresponding Key variable) with your own API key. No subscription login needed.
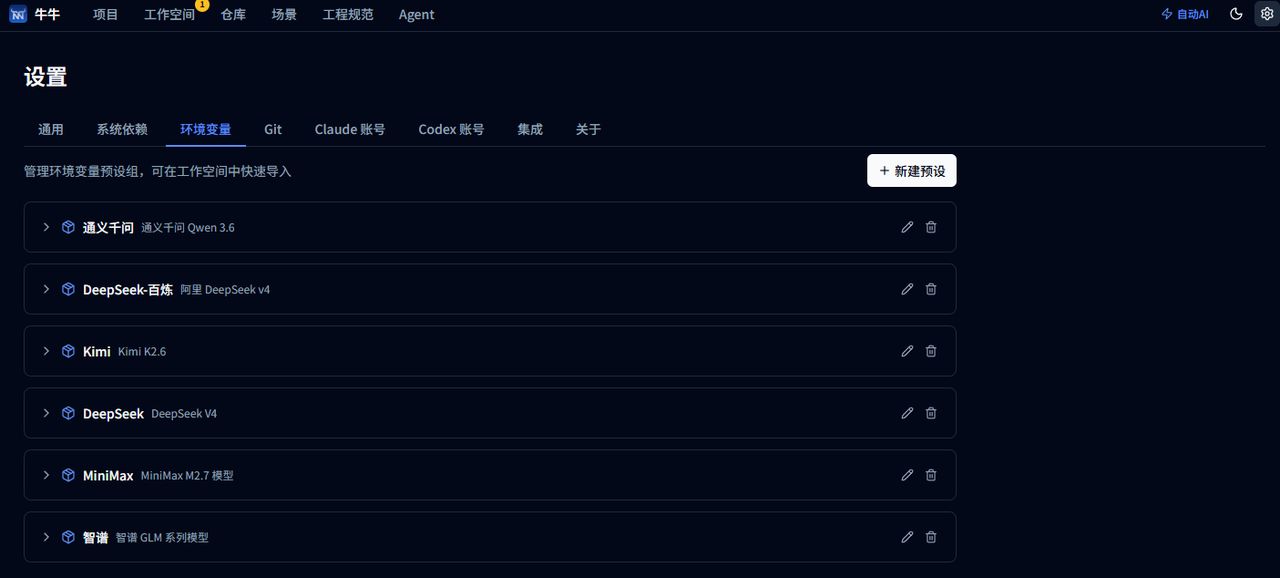
Each preset already has the endpoint and model name filled in; after creating a workspace, open its settings → Environment variables → Import from preset to activate it.
3. Create a workspace
Once dependencies are ready, go back to the main console:
- Switch to the Workspaces tab, click + New Workspace
- Give it a name and pick the repository (you can add a local path or git URL right in the dialog the first time)
- By default it checks out a git worktree based on the repository’s default branch — this becomes the workspace’s isolated working directory
- After creation you land on the workspace detail page
Niuniu writes a
.mcp.jsoninto the worktree so Claude Code can read project state.
Third-party API keys: pick environment variables inside the workspace
If you chose the third-party API key path in Step 2 (Zhipu, Qwen, DeepSeek, MiniMax, Kimi, …), the subscription-login route doesn’t apply — you must inject the matching environment variables into every workspace so the agent talks to the third-party endpoint instead of the official Claude / Codex one.
How to get there: workspace detail page → ⚙ Workspace settings → find the Environment variables section → click Import from preset → choose the platform you want.
Before / after import:
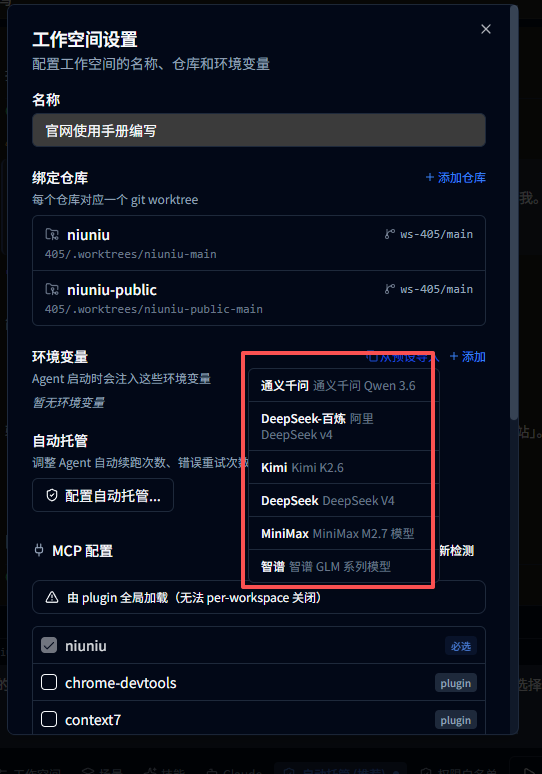
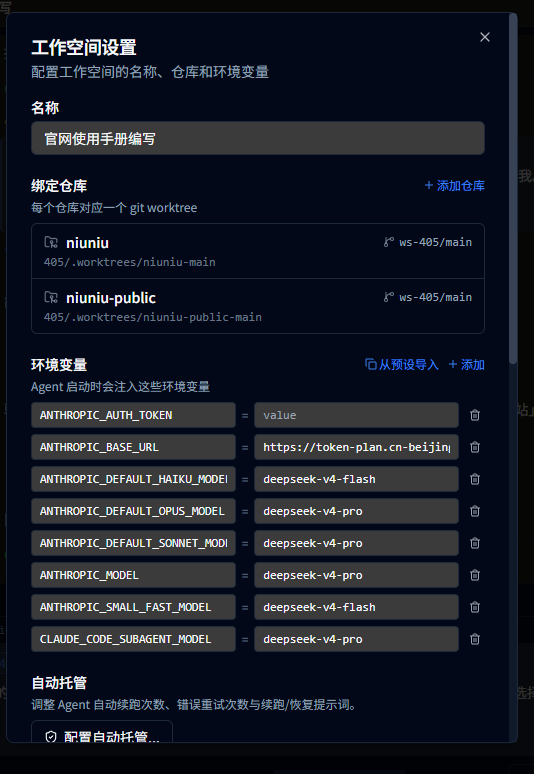
The left screenshot is the initial state — the “Environment variables” section reads “No environment variables yet” and Import from preset lists Qwen, DeepSeek, Kimi, MiniMax, Zhipu, and friends. The right screenshot is after importing the DeepSeek preset: ANTHROPIC_AUTH_TOKEN, ANTHROPIC_BASE_URL, and the per-tier model names (Haiku / Sonnet / Opus / SubAgent) are all filled in at once — just replace the value of ANTHROPIC_AUTH_TOKEN with your own API key.
Heads up: env vars are per-workspace. Every new workspace needs the preset imported again. If you’ll reuse the same platform a lot, tweak the preset under Settings → Environment variables first, then import it into each workspace.
4. Send “hello” to start chatting
On the workspace detail page click Start Agent, then in the chat panel on the left type:
helloPress Enter. Niuniu launches the claude CLI through a PTY terminal; the agent replies with a greeting and is ready for your next instruction — the full loop is now working.
Next steps
- Read Core concepts — how Project / Repository / Workspace / Agent connect
- Read the Workspace & agent chat guide